
Open Graph images play a pivotal role in shaping how your content appears when shared on social media platforms like Facebook, Twitter, and LinkedIn. They are the visual ambassadors of your content, acting as a window to the soul of your website or blog post. Understanding the nuances of Open Graph images and using them effectively can distinguish between a simple URL link and a visually captivating, information-rich snippet that compels users to click and engage.
To add OG images to a page, we usually include meta tags in the <head> section of the page, as shown below, specifying details such as types, sizes, and alt text.
<head>
  <meta property="og:image" content="..." />
  <meta property="og:image:alt" content="About page" />
  <meta property="og:image:type" content="image/png" />
  <meta property="og:image:width" content="1200" />
  <meta property="og:image:height" content="630" />
 </head>
Table of Contents
Creating OG in Next.js
We can create OG images manually but it is not practical for a blog website and those that have too many pages. There are different ways to generate OG images dynamically, such as using Cloudinary’s API or tools like Puppeteer, but these methods require additional effort and resources. In Next.js version 13, the “ImageResponse” is introduced, which can be used to generate OG images dynamically.
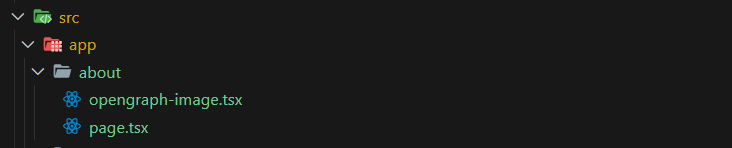
Opengraph-image file
In Next.js, the “opengraph-image” and “twitter-image” file conventions allow you to set Open Graph and Twitter images for a route segment. Here, we add an “opengraph-image” file for the About page.
Note: The name should be exactly the same.
In this file, we can export several pieces of data to create the necessary meta tags, including contentType, size, and alt.
 // Image metadata
 export const alt = 'My images alt text';
 export const size = {
  width: 1200,
  height: 630,
 };
 export const contentType = 'image/png';
Then the following tags will be created automatically.
 <meta property="og:image:alt" content="My images alt text" />
 <meta property="og:image:width" content="1200" />
 <meta property="og:image:height" content="630" />
 <meta property="og:image:type" content="image/png" />
Now, we just need to export a default function from this file with a return type as below. Hopefully the ImageResponse will satisfy this type.
Blob | ArrayBuffer | TypedArray | DataView | ReadableStream | Response
Note: Starting from Next.js version 14, the ImageResponse is exported from ‘next/og’.
 import { ImageResponse } from 'next/og';
 export const size = { width: 1200, height: 630 };
 // Image generation
 export default function Image() {


  return new ImageResponse(
    (
      // ImageResponse JSX element
      <div>
        About page
      </div>
    ),
    // ImageResponse options
    {
      ...size,
    }
  );
}
ImageResponse
The ImageResponse takes two parameters: the first one is the JSX element, and the second one is the options. As you can see, we pass the sizes there. Check the following links for the full list of options from Next.js (link). (https://nextjs.org/docs/app/api-reference/functions/image-response)
Now you can customize the styles as you prefer or create a component for use here. In our example, we’ve created a centred div with a purple background and white text.
// ImageResponse JSX element

      <div

        style={{

          fontSize: 128,

          background: 'purple',

    color: 'white',

          width: '100%',

          height: '100%',

          display: 'flex',

          alignItems: 'center',

          justifyContent: 'center',

        }}

      >

        About page

      </div>
The related meta tags are now added to our page:
<meta property=”og:image” content=”<generated>” />
<meta name=”twitter:image” content=”<generated>” />
Now When you share the links of this page, the generated image will be displayed.

That’s easy, but what should we do for something like blog posts? Do we need to add a file for each post? Fortunately, not. Since we have dynamic routing in Next.js, such as [slug], the params will be passed to this function that contains the data we need to create images for each post.
 export default function Image({ params }: { params: { slug: string } }) {
    // ...
 }
This function can also be an async function, allowing us to fetch data based on our needs, such as loading fonts or obtaining extra data based on the “params”.
How to Create OG (open graph) Images Dynamically: A Conclusion
In conclusion, by using Next.js and the ImageResponse feature, you can easily generate dynamic Open Graph images for your website, making your content more engaging and shareable on social media platforms. This approach streamlines the process and eliminates the need for manual image creation for each page or post.


![Why Custom Web Development is the Best Approach [2024]](https://resources.communere.com/wp-content/uploads/2024/02/Why-Custom-Web-Development-is-the-Best-Approach-1024x570.jpg)